Ginger Tangerine Cranberry Sauce

A delicious, easy to make cranberry sauce recipe to serve with your Thanksgiving Day dinner.


IMG_2216

Ingredients:

  • one bag of fresh cranberries
  • one cup of water
  • 1/2 cup fresh tangerine juice
  • 1/2 cup organic sugar
  • 2 slices tangerine rhine ( use a potato peeler to cut rhine into two, 1/2 inch slices)
  • one bay leaf
  • one teaspoon fresh grated ginger
  • one tablespoon honey

Preparation:

  1. Place all the ingredients except the honey in a medium size saucepan, stir and heat over medium / high heat.
  2. Cook for 10-12 minutes or until  all the cranberries have burst. Stir frequently
  3. Remove from heat
  4. Stir in the honey
  5. Let sit at room temperature.
  6. You can either serve it chilled or at room temp.

Enjoy!

Posted in Recipes | Tagged , , , , | Leave a comment

The Gluten Summit

This is a week long summit with a wide variety of specialists and it’s free! If you, a friend or family member have Celiac Disease or if you are newly diagnosed and confused, you should definitely tune in to this free summit. http//theglutensummit.com

Posted in Uncategorized | Tagged , , , | Leave a comment

Fresh Gluten-free Chicken Stock

IMG_2176 Homemade stocks are extremely good  for you and very easy to make. .
Having fresh stock on hand, especially during the winter months makes it easy to prepare soups, to boil rice and quinoa, or to add flavor to your favorite recipes.
When you use the bones from the chicken you had for dinner along with the meat scarps,  you are not wasting any food, and you are stretching your food dollar. It’s a win, win!
Whenever I cook a chicken I save the bones and innards to make stock. If you live alone and make a whole chicken to eat over the course of a few days, save the bones by wrapping them in freezer paper. Then put them in the freezer along with the gizzards until you are ready to make your stock.
Below is an easy to follow recipe.

Ingredients
-Bones and innards from one roasting chicken ( preferably an organic chicken)
-6 cups of water
-one medium white or yellow onion
-2 stalks of celery
-one large carrot
-3 cloves of garlic
-1/2 teaspoon salt
-1/2 teaspoon of ground pepper
-fresh herbs: 3 sprigs flat leaf parsley, 3 sprigs of fresh oregano, 3 sprigs fresh thyme, 6 fresh basil leaves.

Preparation
1-Place bones and innards in a large pot with 6 cups of water or enough water to totally cover the bones
2-Cut the onion in quarters leaving skin on
3-quarter the celery stalks
4-Smash the garlic cloves with the skin on
5-Add the onions,celery and garlic cloves to pot
6-Add herbs, salt and pepper
7- Place pot on stove over high heat and bring to a rolling boil
8- Reduce to a medium-low heat, cover and simmer.
9- Cook for a minimum of two hours, checking it from time to time.
10-Place a strainer or colander over a large bowl.
11-Pour the contents of the pot into the colander. Let the liquid portions drain through into bowl.
12-Discard the contents of colander.
13- You should be left with 2-3 cups of stock.

Posted in Recipes | Tagged , , , , | Leave a comment

Fresh Herbs, harvesting, drying and storing.

IMG_2148

This past summer, I decided to try to disconnect from the electronic world we live in and reconnect with the natural world around me. I spent as much time as I could outdoors, took trips to the beach with my Huskies, and planted a small herb garden that was very successful.
Now that Fall is upon us, the remaining herbs need to be pruned and harvested before the first frost.
Some varieties of herbs, the perennials, can survive the cold New York winter but most will not. I love to have fresh herbs on hand year round and find that most herbs do well indoors if placed in a sunny southern location.
The best time to harvest your herbs is in the late morning after the dew has evaporated.
Start by digging up a few of each of the herb/plants along with their root system so you can transfer them to a smaller pot or tray for their stay indoors during the winter. Whatever plants you have left by next spring, you can replant outdoors. Cut back the remaining plants using small pruning shears or a kitchen scissor. Spilt the harvested herbs in half. Then dry 1/2 and freeze the other 1/2 in ice cube trays for use in your favorite recipes during the winter months.

Two easy methods for storing your herbs;
1- Drying the herbs.
2- Freezing the herbs in ice cube trays with a little water.

Drying method
-Harvest the herbs and wash with cold water , removing any dirt.
-Dry the leaves with a paper towel making sure to remove any excess moisture and dirt that remains.
-Remove any bruised leaves and stems.
-Create small bundles.
-Suspend the herbs in a paper bag, stem side up, then tie the top of the bag with twine .
-Punch air holes in the bag so air can circulate within the bag. (Don’t hang your herbs in a humid location.) The bag helps keep dust off the herbs during the drying process.
-Hang the the bag on the handle of your kitchen cabinets. Depending on the hardware on your cabinets you can either use a string to hang them, or untwist a paper clip to create an S shape, creating a small hook.
-After the herbs are completely dried, place in a airtight jar. Don’t forget to label the jar so you can easily identify what herb is in it. Include the date on label so you know how long you have them.

IMG_2158IMG_0607

Dried herbs are about three times stronger than fresh herbs. So make sure you adjust your recipes accordingly.

Freezing method
-Harvest the herbs
-Wash them with cold water
-Dry with a paper towel to remove all excess dirt
-Take an empty ice tray
-Remove leaves from the stem
-Discard stems
-Place the leaves from the herbs in different size measurements ( for example; one cube will have a tablespoon of oregano, and one will have a teaspoon , for easy use in your winter recipes). Then cover the herbs with enough water to cover the leaves.
Note: For herbs that have large leaves, such as basil, you will need to chop them up so they can fit into the ice cube tray.
-Freeze
IMG_2163

Posted in Recipes, Uncategorized | Tagged , , , , , , | Leave a comment

The Missing Ingredient ® Gluten-free Breakfast Omelette

It’s true what they say , breakfast is the most important meal of the day. Yet so many people don’t make time to include it in their morning ritual. Well, making a Omelette takes about 5 minutes including prep time. Besides the fact that they take a few minutes to make they are also a great way to use little bits of leftovers to craete the stuffing. Cost effective,time efficient and good for you, you gotta love that!
Follow the Breakfast Episode on the website while making your first one and I think you’ll be surprised how easy it is.
The recipe I did on the show was using mushrooms, broccoli and cheddar cheese.

The recipe below is another one of my favorites.

Ingredients;
2 large beaten eggs
1/8 cup fresh chopped kale leaves (no stems)
1/8 cup of cooked chopped bacon
1 heaping tablespoon crumbled goat cheese (I like Chevre) IMG_2075

2 tablespoons extra virgin olive oil
1 tablespoon of your favorite salsa.

Preparation:
1-Place a small pan over medium heat.
2-Add two tablespoons of olive oil
3-Heat oil for a few minutes.
4-Pour out excess oil
5- Add beaten eggs ( if your pan is hot enough they should start to set immediately around the edges of your pan)
6- Using a spatula pull cooked eggs towards the middle of the pan.

IMG_2078

7- Tilt the pan to cover the uncovered pan area with the upper layer of the uncooked eggs
8- Continue step 7 until egg is cooked
9- Place you mixture of veggies and cheese on one half of the open omelette
10-Using your spatula flip the empty half over the veggie/ cheese mixture
11-Roll onto plate and garnish the top with salsa.
IMG_2081

Posted in Recipes | Tagged , , , | Leave a comment

May is Celiac Awareness Month!

Celiac disease is one of the most prevalent autoimmune disorders in the world. More Americans are living with celiac disease than with any of these chronic illnesses – Crohn’s disease, ulcerative colitis, Parkinson’s disease, cystic fibrosis, lupus, epilepsy and rheumatoid arthritis.
That being said, it is still taking most people 5 to 10 years to be diagnosed. There is still a lot of work to be done to educate the public and the doctors on this disease which continues to grow at an alarmingly rate. Raising awareness is as easy as talking to a few people about your Celiac experience.It has been my experience over the last 12 years, that most people are unaware that Celiac Disease can have so many systemic complications such as; bone & skin disorders, chronic fatigue, anxiety and depression, along with the basic gastrointestinal symptoms which is why I feel it is so commonly misdiagnosed.

Share your information, it could help change someone’s life!

Posted in Uncategorized | Tagged , , , , , | Leave a comment

The Missing Ingredient Gluten Free Recipes; Roasted Asparagus & Shishito Peppers with Basil Aioli

IMG_1826Asparagus and Peppers are packed with nutrients such as vitamins A,C, and K along with great antioxidant properties. This recipe makes an ideal appetizer served with  Processco or Cava. Your guests will love them as they are fun to eat and won’t fill them up  before dinner.

What you’ll need to serve 4 people.

1 lb fresh Asparagus

24 fresh Shishito peppers

1/2 cup Mayo

1 clove of pressed garlic

1 teaspoon fresh chopped basil

3 teaspoon fresh lemon juice

1 tablespoon good Olive oil ( plus two teaspoons for veggies)

A pinch of fresh ground black pepper

Sea salt

Preheat oven to 425.

To Prepare the Aioli;

1-Place mayo in a mixing bowl.

2- Heat Olive oil over low heat for about 2 minutes. You don’t want it to hot .

3- Add the pressed garlic clove and combine.  Remove from heat. You don’t want to cook the garlic or brown it. You just want to infuse the garlic flavor into the oil.

4- Once the garlic infused oil is cooled, stir it into the mayo.

5- Stir in the lemon juice, chopped basil and pepper. You’re done.

To prepare the veggies.

1- Wash the Asparagus and pat dry.

2- Cut off the white bottoms of the stems so you are left with only the green portion and the tops.

3-  Place the Asparagus on a cookie sheet and drizzle with one teaspoon olive oil. Rub the oil over the Asparagus until they are nicely coated. Sprinkle with sea salt.

Cook for 8 minutes. Don’t over cook them. You want them to have a crunch when you bite into them. Drizzle with a little lemon juice and they are ready to serve.

To prepare the Shishito Peppers.

1- Wash peppers and pat dry.

2- Place on cookie sheet.

3- Cook for 10 minutes or until the start to blister. Remove for oven.

4- Drizzle with a teaspoon of olive oil and sprinkle with salt. Toss to coat.

+++Note since the peppers take longer than the Asparagus, put them in the oven first for about 2-3 minutes then put the Asparagus in and set the timer for 8 minutes.


Posted in Recipes | Leave a comment

The Missing Ingredient® Gluten-Free/ Grain-free/ Zucchini Lasagna

IMG_1845

3 large zucchini with skin, sliced horizontally (about ¼ inch thick)

1 ¾ cups fresh ricotta cheese

1 cup grated Parmigiano Reggiano (don’t use cheap Parma)

¾ cup grated fresh mozzarella cheese

1 ¼ cup finely chopped cremini mushrooms

2 large carrots finely chopped

2 stalks of celery finely chopped

2 large garlic cloves pressed

¼ cup chopped shallots

3 cups spinach chopped

2 tablespoons  Extra Virgin Olive oil

¼ teaspoon of Himalayan Pink sea salt

I cup of your favorite homemade tomato Sauce

4 Large Basil leaves

Preheat oven to 425 degrees

Preparing the Filling.

 1- Heat the two tablespoons of olive oil over medium heat, then add the garlic and shallots.  Cook about 2 minutes

2- Add the carrots, celery, mushrooms, and spinach. Stir occasionally

3- Cook the mixture 10-15 minutes uncovered.

4 – Remove from heat and let cool. Drain excess liquid for mixture.

5- Place the fresh Ricotta in a large mixing bowl and stir in the cooled veggie mixture. Combine thoroughly

6- Stir in the Parmigiano and sea salt until combined.

Preparing the Zucchini

IMG_1837

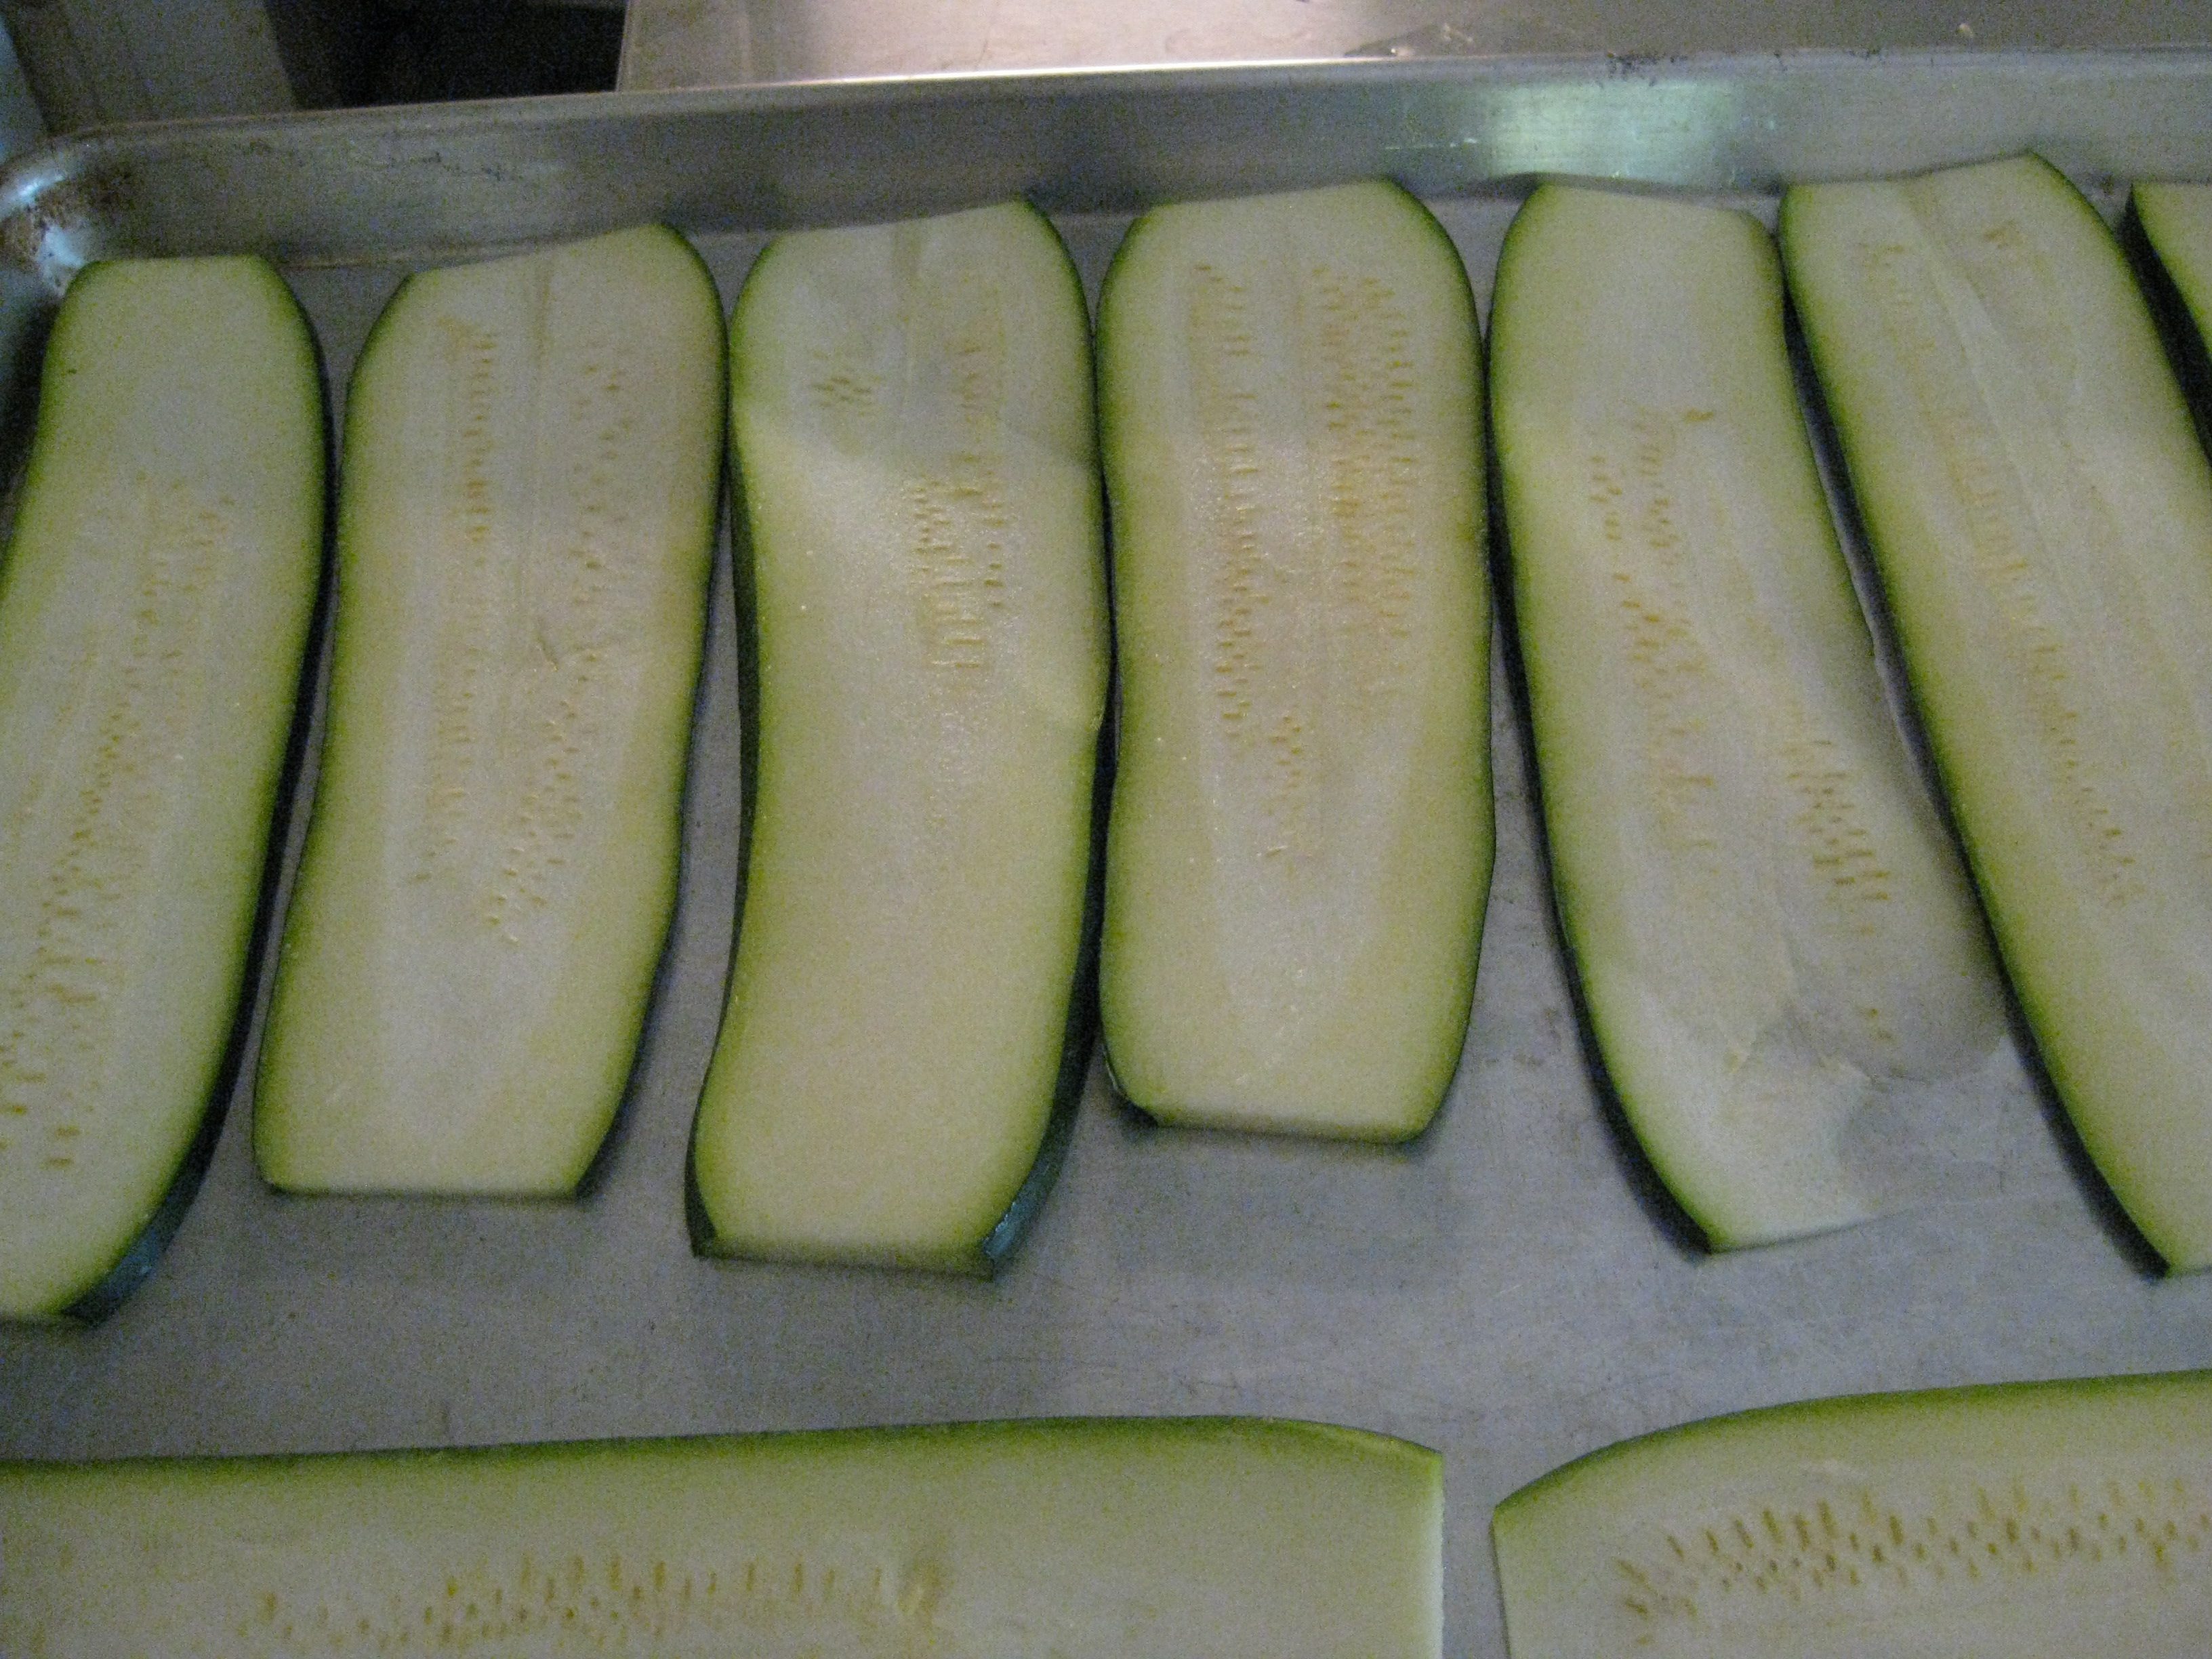
1- Cut the zucchini lengthwise, creating slices that are roughly ¼ inch thick.

2- Place a colander over a large bowl. Put the cut zucchini in the colander and sprinkle with sea salt. Cover with plastic wrap for 30 minutes. (Steps 2-5 are very important to remove some of the water from the zucchini. Otherwise it will not hold together and you will be left with a sloppy mess after you bake it.)

3- Press zucchini slices between two pieces of paper towel.

4-Place cut zucchini slices on a large cookie sheet and roast for 5 minutes at 425. Repeat until all the slices have been roasted. Let cool so you can handle the slices.

5- Remove the zucchini strips for the cookie sheet and press between two paper towels.

You’re ready to put it all together

Reduce the oven temperature to 375


IMG_1844

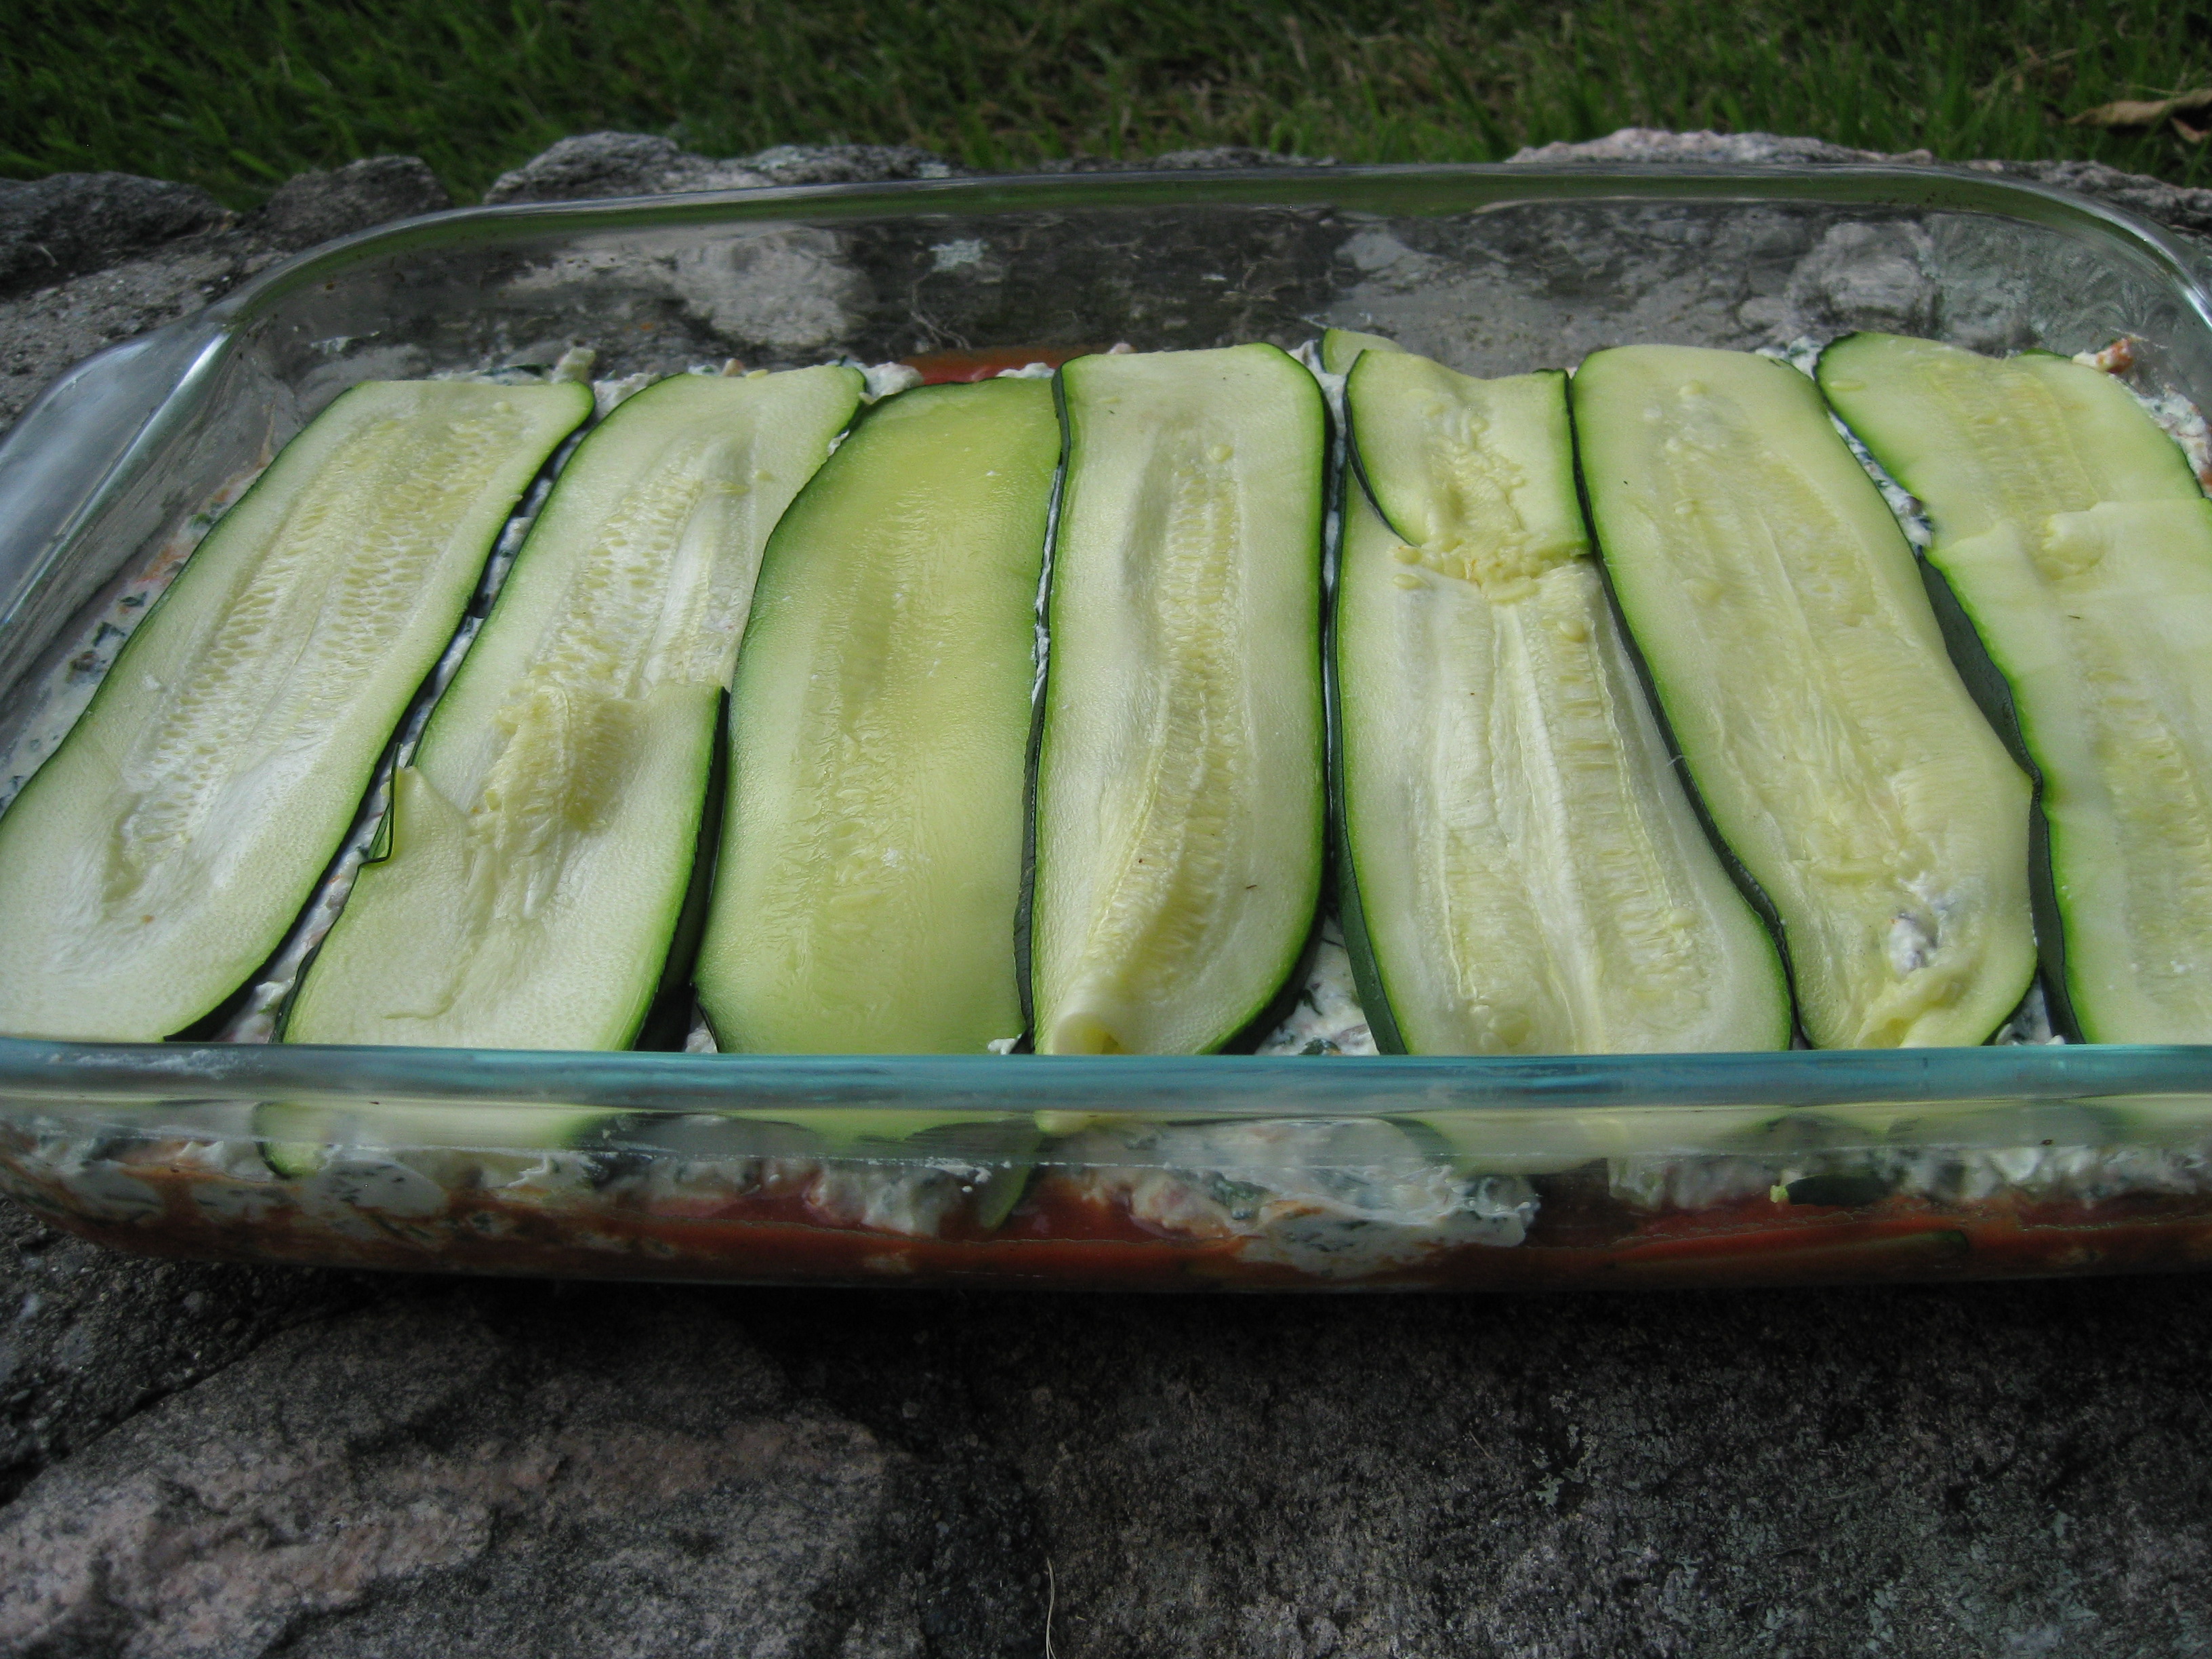
1-Lightly coat the bottom of a baking dish with some of the tomato sauce. (Less is more in this case.)

2- Place zucchini strips side by side until the bottom of baking dish is covered.

3- Add a layer of the cheese/ veggie filling.

4- Repeat steps 2 and 3 until you have used all the mixture.

5- Cover the top layer of zucchini with Roasted tomato sauce.

6- Cover the sauce with mozzarella cheese.

7- Sprinkle with torn basil leaves and freshly ground pepper

8-Tightly cover with tin foil and bake for 30-45 minutes depending on your oven.

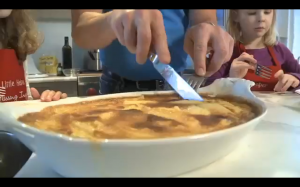
9-Remove from oven and let stand approximately 10 minutes uncovered before cutting.

10-Cut the lasagna straight down the middle first.

Then cut across, in between the zucchini slices making a total of 6 servings, each consisting of two zucchini slices.


Note: If you let this sit over night in the refrigerator it pulls together nicely. Then reheat and serve. I think most baked Italian dishes are always better the second day.


The Missing Ingredient® is a registered trademark of Cody Boy Inc.

All rights reserved

Copyright © 2012 The Missing Ingredient®

Posted in Recipes | Tagged , , , | Leave a comment

GLUTEN-FREE/ WHEAT –FREE / KOSHER -QUINOA BERRY TART

Watch the Kosher episode of The Missing Ingredient as you cook!

For those of you that are gluten-free kosher and are not having this dessert with meat, I highly recommend using regular organic unsalted butter instead of the Vegan butter. Both are good, but in this case regular butter is better!

food1-sidebar

INGREDIENTS:

Tart shell:

– 1 cup of gluten-free organic Quinoa flour

– ½ cup of gluten-free Quinoa flakes

– 1/3 cup of organic cane sugar

– ½ teaspoon of Xanthan gum

– 1 egg yolk

– ½ cup of Vegan butter or regular organic unsalted butter, cold

– ¼ teaspoon of salt

 Fruit filling:

– 6 oz’s of organic raspberries or blackberries

– 2 ½ tablespoons of organic cane sugar or honey

Pre-heat oven at 400 degrees

Filling:

1- Place your choice of berries, and sugar or honey, in a small saucepan. Mash with potato masher, and then stir.

2- Place on a medium to low flame for about 15 minutes or until it resembles a loose jam consistency. Stir occasionally.

3- Remove from heat and let the filling get to room temperature. Then place it in the refrigerator for about an hour.

Tart Crust:

1- In a food processor combine organic Quinoa flour, organic Quinoa flakes, sugar, cold butter, xanthan gum and salt. Then press the dough button on your processor and mix for about 3 minutes.

2- Add the egg yolk and pulse for about 3 minutes.

3- Knead the dough with your hands and mold it into a disk shape.

4- Place the disk of dough on a small plate, cover with plastic wrap and place in the refrigerator for one hour.

5- Dust a piece of wax or parchment paper with gluten-free Quinoa flour.

6- Take the dough from the refrigerator and warm by kneading it with your hands for a few seconds then rolling it on the dusted wax or parchment paper.

7- Tear off pieces of the dough creating large golf ball size pieces (should make 6 balls).

8- With your hands take each ball and flatten it, then pinch around the edges to make the rim of the tart.

9- Place each tart crust shell on a large cookie sheet lined with parchment paper and bake for 10-12 minutes.

10 – Remove cookie sheet from oven. Using a spatula, slide the tarts directly on to the cookie sheet while removing the parchment paper. Do this slowly as they will break if you move to fast. (See episode for how to remove parchment)

10- Place tarts back in oven for another 5 -8 minutes or until they are lightly brown.

11- Remove from oven and let sit on cookie sheet until they are cool enough to touch.

12-Remove the tarts from the cookie sheet, and place on a cooling rack for 20 minutes.

13- Fill each tart with the fruit filling and refrigerate for at least 4 hours or over night

14- Remove tarts from refrigerator a ½ hour before serving.


Posted in Recipes | Tagged , , , , | Leave a comment

The Missing Ingredient Gluten-free Pear Clafoutis

Watch the episode “Cooking with Kids- Risotto and Pear Clafoutis” while you cook! This is a great winter dessert.

Picture 1

Clafoutis is traditionally made with dark cherries but you can use any seasonal fruit to make a great dessert such as peaches, apples or pears.

Ingredients:

-3 medium size firm, ripe Pears (I prefer Bartlett pears for baking, but others work as well).

-3 eggs

-1 ½ cup of organic heavy cream

-1/3 cup of organic cane sugar

-1 teaspoon lemon zest

-¼ teaspoon of sea salt

-2 teaspoons of organic vanilla extract

-8 tablespoons of gluten-free almond meal/ flour

-1 tablespoon of gluten-free white rice flour

-A small slice of butter for coating the baking dish and a little extra organic sugar to dust the dish

Preparation

1- Pre-heat oven to 375 degrees.

2- Grease a ceramic baking dish with butter then dust the dish with organic sugar.

3- Skin and core pears then cut them into quarters, then into thinly sliced pieces.

4- Place the slices across the bottom of the dish tightly together covering the bottom of the dish completely with the fruit.

5- Place the eggs, cream and sugar in a large mixing bowl and beat on high speed until mixture is fluffy about 2 minutes.

6- Then add almond flour, white rice flour, salt, lemon zest and vanilla extract. Beat on a low speed for about 2 minutes. The batter should resemble the consistency of pancake batter.

7- Pour the batter over the fruit slowly covering the fruit completely.

8- Place on the center rack and bake for 40- 45 minutes or until the top is a light golden brown.

9- Serve warm.


Posted in Recipes, Uncategorized | Tagged , , , , | Leave a comment